
Oleksii Aleksieiev
Webflow Expert

Autoplay Background Video Playing on Loop
Working on Safari and iOS
Here's a step-by-step tutorial on how to integrate adaptive video using Webflow. This tutorial includes adding video with automatic quality change depending on the connection speed.
Creating HTML structure
We need to create a similar HTML structure
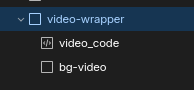
<div class ="video-wrapper">
	//Embed with the video code
	<div class="bg-video"> </div>
</div>
With those style settings.
<style>
    .video-wrapper {
        position: relative; /* or absolute depending on your needs */
   		 /*You can add other settings as needed */
    }

    video {
        position: absolute;
        top: 0;
        left: 0;
        z-index: -4;
        width: 100%;
        object-fit: contain;
        pointer-events: none;
    }

    .bg-video {
        height: 100%;
        width: 100%;
        position: absolute;
        z-index: -3;
        top: 0;
        left: 0;
        background-size: contain;
        background-repeat: no-repeat;
        background-position: center;
        background-color: transparent;
        pointer-events: none;
        background-image: url("https://video_link-lq.mp4");  /*link to your video*/
    }
</style>
Add an Embed element to the page.
-
Find the “Embed” element in the toolbar and drag it onto the page.

- Insert the following code:
<video autoplay="autoplay" muted="muted" loop="loop" playsinline poster="https://poster_link-lq.jpg">
  <source src="https://video_link-lq.mp4"
          data-hq="https://video_link-hq.mp4"
          data-lq="https://video_link-lq.mp4"
          type="video/mp4">
</video>
Tag <video>:
- autoplay: the video will automatically play when the page loads.
- muted: the video will play without sound.
- loop: the video will repeat indefinitely.
- playsinline: allows you to play a video within an element rather than on the full screen.
- poster: the image that is displayed before the video starts playing.
Tag <source>:
- src: initial video source (low quality).
- data-hq: URL for high quality video.
- data-lq: URL for low quality video.
- type: video file type.
Adding JavaScript code to control video quality
- Go to “Project Settings”.Select “Project Settings” from the top menu.
- Add the code in the Custom Code section. "Before </body> tag".
<script>
    function setVideoQuality() {
        const videos = document.querySelectorAll('video');
        if ('connection' in navigator) {
            const connection = navigator.connection || navigator.mozConnection || navigator.webkitConnection;
            const effectiveType = connection.effectiveType;
            videos.forEach(video => {
                const source = video.querySelector('source');
                if (effectiveType !== '2g' && effectiveType !== '3g' && connection.downlink >= 1.5) {
                    source.src = source.getAttribute('data-hq');
                    video.load();
                }
            });
        }
    }
    setVideoQuality();
</script>
Your video is now adaptive and adjusts to the quality of the user's connection, works on both Windows and Mac. When uploading a video, the user will see a poster of the image instead of a blank space. Don't forget to change the video and image URLs to your own to customize to your needs.